
 The Log Cabin block is a really fun block to make. It seems complicated
because there is A LOT of cutting and measuring involved, but it's quite simple after all your pieces are cut.
The Log Cabin block is a really fun block to make. It seems complicated
because there is A LOT of cutting and measuring involved, but it's quite simple after all your pieces are cut. **Makes 8 total blocks**
CUTTING/MEASUREMENTS: (see examples in picture below)
#1: Cut and measure a 1 1/2" x 22" strip for a center square color (mine is red, a medium dark, for the hearth or fire. You can also have yellow as your center square for a candle, or black for death. Why would you want that though?).
Cut 8- 1 1/2" center squares from this, giving you 8 little red squares.
#2: Cut and measure a 1 1/2" x 22" strip of another dark color. Cut the same as above, 8- 1 1/2" squares. You will have a second set of 8 small squares.
#3: Cut and measure a 1 1/2" x 22" strip of a medium dark color (mine is green). Cut 8- 2 1/2" logs from this.
#4: Cut and measure a 1 1/2" x 22" strip of a medium light color (mine is yellow). Same as above, cut 8- 2 1/2" logs from this.
#5: Cut and measure a 1 1/2" x 22" strip of another medium light color (mine is light blue). Cut 8- 3 1/2" logs from this.
#6: Cut and measure a 1 1/2" x 22" strip of a dark color (mine is dark blue). Like above, cut 8- 3 1/2" logs from this.
#7: Cut and measure a 1 1/2" x 22" strip of another dark color (mine is the dark flower pattern). Cut 8- 4 1/2" logs from this.
#8: Cut and measure a 1 1/2" x 22" strip of a light color (mine is the light flower pattern). Same as above, cut 8- 4 1/2" logs from this.
#9: Cut and measure a 1 1/2" x 22" strip of another light color (mine is the light seed pattern). Cut 8- 5 1/2" logs from this.
#10: Cut and measure a 1 1/2" x 22" strip of another medium dark color (mine is the same green as before). Cut 8- 5 1/2" logs from this.
#11: Cut and measure a 1 1/2" x 22" strip of another dark color (mine is the dark blue again). Cut 8- 6 1/2" logs from this.
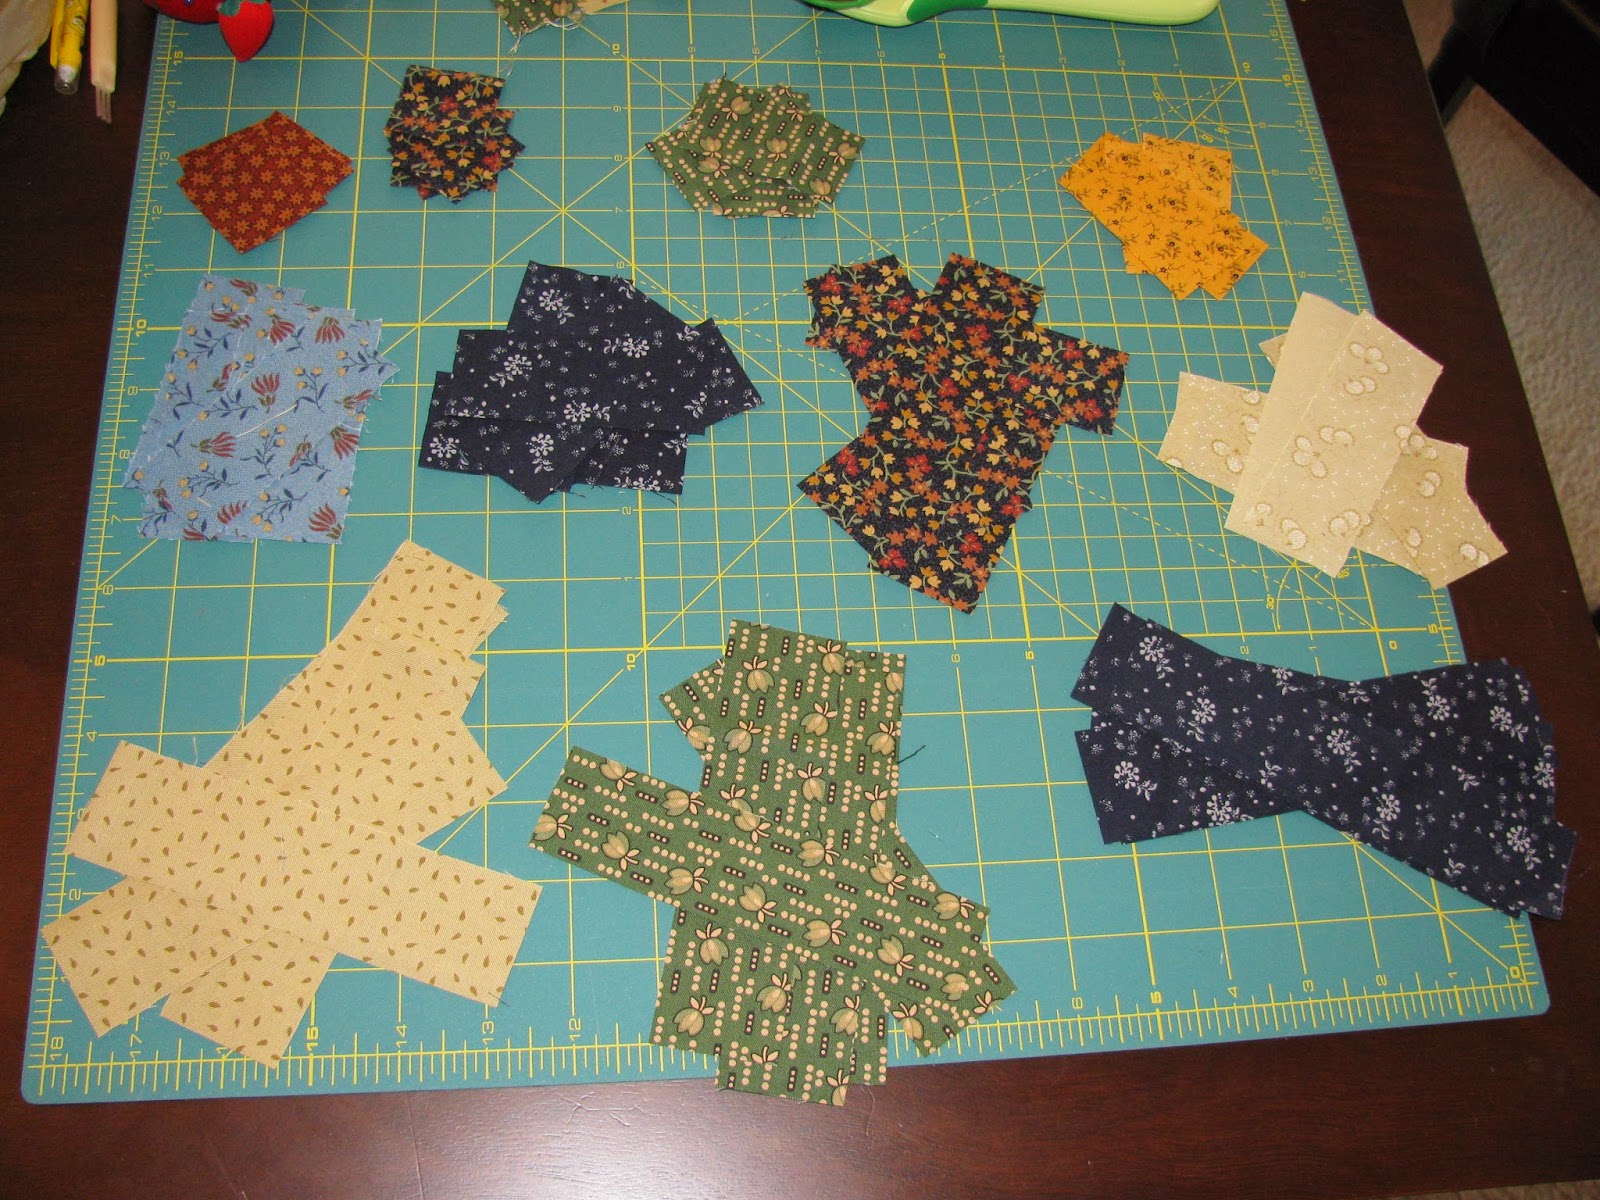 |
| Cut up logs ready to go! |
Now the fun sewing begins! All that cutting and measuring is rewarded! :o)
NOTE:
- The sewing of the squares and logs together, will ALWAYS rotate clockwise to add on the next log. (see picture below)
- Set up a block with unsewn pieces in correct placement and order before sewing them together. This will help remind you of which log pieces should go where and which order to sew in.
- You can also number each piece (for your first block) with a piece of sticky note (1,2,3 etc.) to remember which piece is which and in which order to sew. Once you have a sewn block, this should suffice for a good model, no sticky notes needed.
- I will be referring to certain pieces by their numbers so there is less confusion. If you have your first set numbered and ready, it will go quickly! (Each log is numbered with their respective cutting step number, as listed above. Example: #1 log is from #1 cutting step).

2. Sew #3 to #1 and #2, underneath. Press.
3. Sew on #4 to side of #3 and #1. Press.
4. Sew on #5 to the top of #4, 1 and 2.
5. Continue the pattern around, pressing each seam.
 |
| Finished log cabin block! (on it's side) |

No comments:
Post a Comment