October 30, 2013

Quilting: Log Cabin Patch Block

The Log Cabin block is a really fun block to make. It seems complicated because there is A LOT of cutting and measuring involved, but it's quite simple after all your pieces are cut. 

**Makes 8 total blocks**

CUTTING/MEASUREMENTS: (see examples in picture below)

#1: Cut and measure a 1 1/2" x 22" strip for a center square color (mine is red, a medium dark, for the hearth or fire. You can also have yellow as your center square for a candle, or black for death. Why would you want that though?). 

Cut 8- 1 1/2" center squares from this, giving you 8 little red squares.

#2: Cut and measure a 1 1/2" x 22" strip of another dark color. Cut the same as above, 8- 1 1/2" squares. You will have a second set of 8 small squares.

#3: Cut and measure a 1 1/2" x 22" strip of a medium dark color (mine is green). Cut 8- 2 1/2" logs from this.

#4: Cut and measure a 1 1/2" x 22" strip of a medium light color (mine is yellow). Same as above, cut 8- 2 1/2" logs from this.

#5: Cut and measure a 1 1/2" x 22" strip of another medium light color (mine is light blue). Cut 8- 3 1/2" logs from this.

#6: Cut and measure a 1 1/2" x 22" strip of a dark color (mine is dark blue). Like above, cut 8- 3 1/2" logs from this.

#7: Cut and measure a 1 1/2" x 22" strip of another dark color (mine is the dark flower pattern). Cut 8- 4 1/2" logs from this.

#8: Cut and measure a 1 1/2" x 22" strip of a light color (mine is the light flower pattern). Same as above, cut 8- 4 1/2" logs from this.

#9: Cut and measure a 1 1/2" x 22" strip of another light color (mine is the light seed pattern). Cut 8- 5 1/2" logs from this.

#10: Cut and measure a 1 1/2" x 22" strip of another medium dark color (mine is the same green as before). Cut 8- 5 1/2" logs from this.

#11: Cut and measure a 1 1/2" x 22" strip of another dark color (mine is the dark blue again). Cut 8- 6 1/2" logs from this.
Cut up logs ready to go!
Sewing:
Now the fun sewing begins! All that cutting and measuring is rewarded! :o)


NOTE: 
  • The sewing of the squares and logs together, will ALWAYS rotate clockwise to add on the next log. (see picture below) 
  • Set up a block with unsewn pieces in correct placement and order before sewing them together. This will help remind you of which log pieces should go where and which order to sew in. 
  • You can also number each piece (for your first block) with a piece of sticky note (1,2,3 etc.) to remember which piece is which and in which order to sew. Once you have a sewn block, this should suffice for a good model, no sticky notes needed. 
  • I will be referring to certain pieces by their numbers so there is less confusion. If you have your first set numbered and ready, it will go quickly! (Each log is numbered with their respective cutting step number, as listed above. Example: #1 log is from #1 cutting step).  
1. Sew #1 (center red square) to #2 (dark flower pattern piece). Always place pieces face to face, that is right side to right side, and (always) sew a 1/4" seam. #1 piece (red square) stays on the left! Press the seam flat with an iron.

2. Sew #3 to #1 and #2, underneath. Press.

3. Sew on #4 to side of #3 and #1. Press. 

4. Sew on #5 to the top of #4, 1 and 2.

5. Continue the pattern around, pressing each seam.
Finished log cabin block! (on it's side)
 Have fun!

October 28, 2013

Heirlooms Tomatoes & Pincushion Wristband

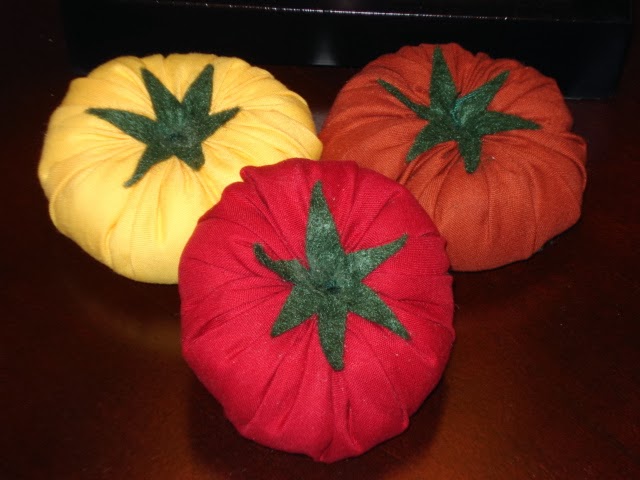
These heirloom tomatoes are so cute and a perfect little decoration! I have adapted the directions for this project from here.
*Sorry in advance for all the blurry pictures! The camera I was using just would NOT focus nicely.*

Heirloom Tomatoes
-3 different cotton fabrics for tomato body (I chose a deep yellow, orange and red)
-thread and needle
-cotton batting
-fabric glue
-felt for tomato top

1. Cut a circle out of your fabric. Mine were about 7 inches in diameter.
2. With the fabric wrong side up, sew a running stitch around the perimeter of the circle (having a knot at the end). When you've stitched the entire outside, pull the string to gather the fabric.
3. Stuff with cotton batting (good for pincushion use). Now stitch the opening closed with the left over thread. Tie off the thread on top.
4. Cut out tomato topping (template from the site above here), glue down the top onto tomato to cover stitched closing. 
5. Take the remaining thread, tie a knot at the end, and starting from the tomato top in center, thread the needle down through the entire tomato, out the bottom and back up. Repeat a few times. *Pull thread tight during this step* Tie off on top of the tomato. Running thread through the core (and keeping tight) should give the tomato a flattened heirloom look. *If you want to attach this tomato to a wristband, hold off on threading down through the core until you have your bracelet cover made. See below.*

This is what it could look like on the bottom of the tomato after the core threading.
Finished with the tomatoes!
Pincushion Wristband:

-slap bracelet (I searched every where and found one at Walgreens, not even a plain one)
-rubber glove
-cotton fabric to cover bracelet (mine is green)
-pencil

1. Measure and cut out a 2 3/4" x 9 1/2" fabric piece for your bracelet. Make sure it will fit the bracelet. You can also fold in half to size get the correct size. It should have some extra space on all sides for seam allowance).
2. Fold the fabric so the right sides are face to face, sew a 1/4" seam allowance down one long edge, and a bottom short end (leaving one short end open).
3. Cut fabric edging close to seam.
4. Turn right side out.
5. Slide slap bracelet into cover.
6. Sew the last side together, with the bracelet inside, and cut close to seam when finished.
Finished with the bracelet cover!

To attach a tomato to the bracelet:

For this bracelet I made the running stitch farther apart from each other to allow for more batting. I stuffed it fuller and didn't flatten into an heirloom shape as much, allowing more space and room for the length of the needles.

1. After threading down through the core of the tomato, thread through the top fabric of the bracelet and back up the tomato (may need to use a glove to grasp the needle to pull out if you stuffed it really full). I marked the center of mine so I would know where to thread. Don't pull thread tight until the very end!!
2. Thread back down through the tomato and the top of the bracelet fabric in an X formation, remembering to keep the thread loose.
3. Once you are finished threading through the tomato and the fabric of the bracelet (and your needle and thread are pulled out the top of the tomato), pull the thread tight. Tie off thread and you're done!

Finished pincushion bracelet!


Try out more pincushions here!

October 24, 2013

Christian: One Year Old

Happy birthday to my amazing little Christian! The time has sure gone by fast. We have been so blessed with such a cute, sweet, smart, happy, funny, adorable little boy. Through all the anxiety of this day a year ago, due to a c-section because of our stubborn little single footling breech baby, I'd do it all over again in a heartbeat. I never imagined how much my life would change for the better, or how much I was missing, until you arrived. We love you Christian boy!

October 23, 2013

Favorite Autumn Pins

I never thought that at almost 30 years of age, I'd change my opinion on what my favorite season of the year is. Autumn is now officially my favorite season (it was Spring)! I love all the food, holidays, crisp air, outdoor activities like apple picking, pumpkin patches and hayrides, plus hoodie weather is so cozy. :o)

I have thrown together an array of my Favorite Autumn Pins: food, decorations, DIY etc. If you are unfamiliar with Pinterest, all you have to do to see the directions or more in depth description of the picture, click the link, then click the picture on the link. That's it! 
*Note: I do not claim any of these pictures as my own. They belong to their respective pin.*

1. A gorgeous Pheasant Feather Wreath
2. A lovely apple arrangement
3. Pumpkin Mice
4. Autumn Activity Tree
5. DIY Pumpkin Center Piece
6. DIY I am Thankful Turkey
7. DIY Pinecone Garland
8. Creeping Spiders
9. Boo sign
10. Apple Pancakes
11. Crockpot Cream Cheese Chicken Chili
12. Crockpot Apple Sauce (no honey so great for babies too!)
13. Apple Pie (in an apple)!
14. Panera Broccoli Cheese Soup
15. Pumpkin Cream Cheese
Enjoy!

October 18, 2013

One Year Photo Shoot

Although Christian is very soon to be one, I wanted to share his one year old pictures!

It's true what they say, that "the days are long, but the years are short." I can't believe it's already been almost a year since my little Christian was born! A lot has happened in this past year, and hands down the most special, life fulfilling, exciting experience of the year has been becoming a mother. Add stay-at-home mom to that list now! :o)

My "short story"
Although my pregnancy was predictable and normal, Christian's birth had an unexpected twist at the end. We learned in my 41st week of pregnancy (4 days "late"), that the baby was a single footling breech (one foot down). Even though we had a natural birth planned, I ended up having a Cesarean to prevent a possible cord prolapse, at 11 days "late." I was devastated. The last week of my pregnancy was filled with stress, tears, doctors appointments including an ECV (External Cephalic Version), chiropractor appointments for multiple Webster adjustments, etc., all in an effort to turn him around. 

Even though I was pretty miserable that last week of pregnancy, and selfishly thought about really nothing other than my own safety because of a major surgery, I would do it all over again. I recovered quickly and I had a healthy adorable baby boy. The second I heard him cry, I knew him. I knew his cry like I had heard it every day of my life. I knew it like that sound had always been apart of my dreams... always a part of me. If you've ever given birth or have seen the birth of your child, you know what I'm talking about. It's an awaking of the soul that is so surreal, you begin to wonder if this is really an Earthly experience. I praise God for helping carry me through my last week of pregnancy and Christian's delivery. He saw me through, anxiety attacks and all, and blessed me with such a happy little Mr. Handsome.

Photos
Photography has been a love of mine for many years now, and I love being able to save money when I can. I know that many people tend to spend money on photographers to capture their little one's milestones, but I thought it'd be more fun if I were the one to take my son's one year old photos. 
  
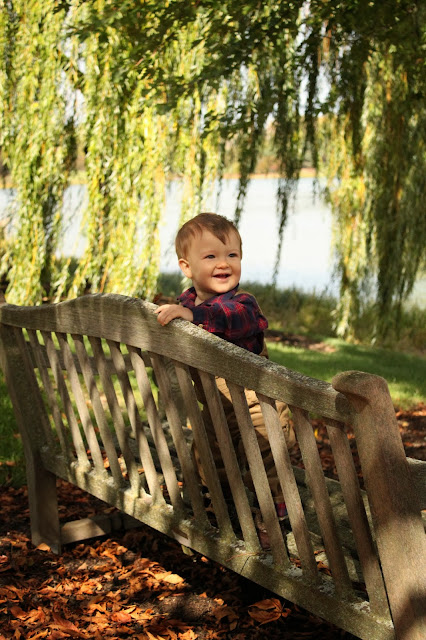
Christian, my husband Michael, his parents, and myself walked the beautiful grounds of the Chicago Botanic Garden looking for perfect locations to take some photos. If you are unfamiliar with the area, the garden is a local place where many like to visit for a beautiful walk, bike ride, or tour to see amazingly well kept local vegetation, such as prairie land, as well as exotic plants like the Bonsai collection. The beautiful landscapes, sculpted shrubs, and gorgeous flowers are not all they have to offer. They also host many events such as HallowFest, Garden Chef Series, Antiques & Garden Fair, concerts, Farmer's Market as well as have TONS of activities for kids, including their kids summer camp: Camp CBG (which I actually worked for as a counselor for a summer)!

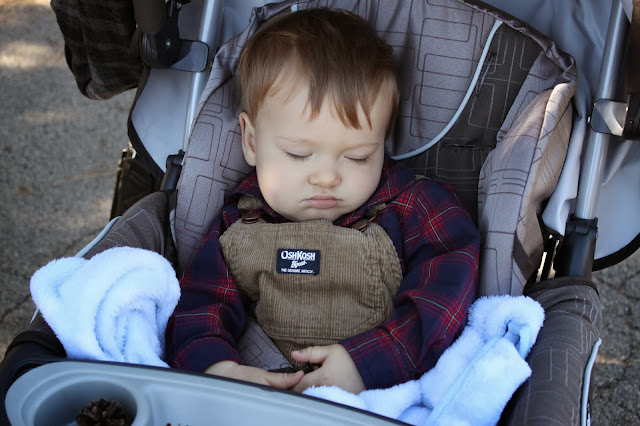
This was the perfect place for Christian's one year old photos. The weather was perfect for our outing and Christian was such a good sport despite his nap time being pushed back. 

These are just a few of my favorites from that beautiful day.
Isn't she a beauty? I entered her into the garden's fall photo contest. Finger's crossed!
What a tuckered out little guy. He fell asleep pine cones in hand!


How do you think they turned out?!


Related Posts Plugin for WordPress, Blogger...