
 I found a new love of sewing, especially embroidery, this past year and wanted a chance to embroider more. Since we have a trip coming up that involves Christian's first flight (eeek!), I thought this was a great opportunity to make him a quiet book.
What to do before sewing
-Brainstorm ideas of the pages you want to create. If you're super organized, you can make a list of all the colors of felt you'll need and materials. I just bought what I saw that I liked and knew I'd use.
-Have an idea of the size you want for you quiet book pages. I stuck to having one page of felt be one quiet book page.
-Know how you will bind your book. VERY important, because you'll need to leave a margin on the side of your page to connect them.
-Decide if you will have one sided or two sided pages. Leave a margin on every side to accommodate for finishing stitches.
-Layout your design on the page so you can see where everything will fit. Even pin things in place if you'd like.
I learned a lot of these after I already started, like leaving space for binding and a margin for a finishing hem. Oops.
First thing I started with awhile ago, was getting ideas together on the pages that I wanted in the book. You can see everything I've collected so far on my Pinterest board here. Then I made a list of all the pages that I liked the most.

Many of the pages I've made, or will make, are recreations of pages I've found online. I've thrown in my own ideas here and there, with a few original pages, but I felt I was able to crank more pages out the less creative I was. :o( Since these are so fun to make though, I'm sure I'll be making more after we return from our trip when I have the luxury of brainstorming and creating original pieces!

I hand stitched everything, starting with the ribbon and pearls to make sure they were secured. Then I stitched the cloud over them.
 My next page was a lion.
 The lion was a little trickier because of the fuzzy mane. I first made the outline of the face and sewed on the mane by attaching it with a whip stitch in orange floss. Then I attached the button eyes and sewing on its face and whiskers. Before attaching the entire head to the felt page, I sewed the ribbon on.

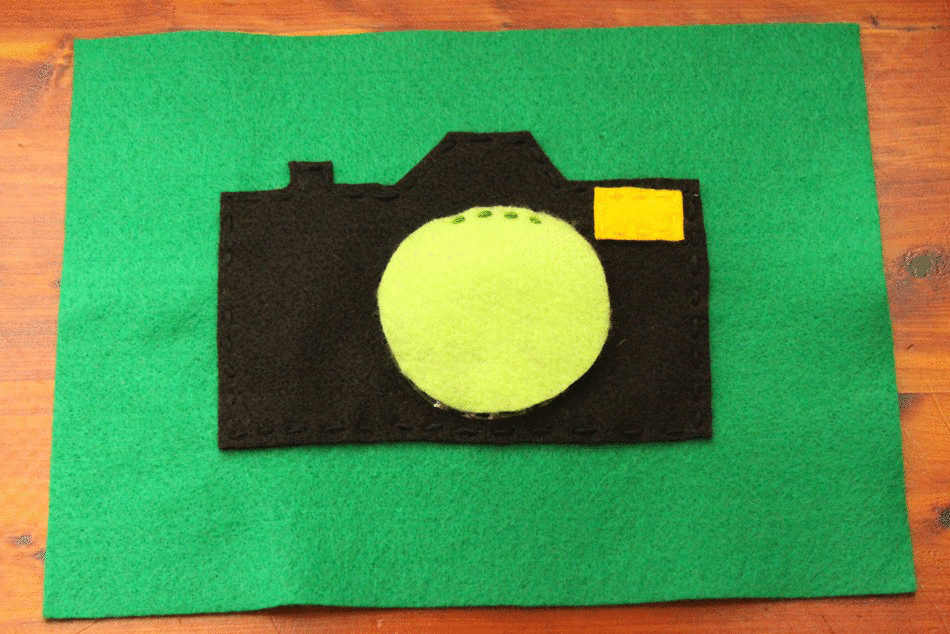
This camera page was fun to make too! It was my first time sewing vinyl and it wasn't bad at all. I've heard that machines can have issues with vinyl putting hand stitching was a cinch. I love that I can switch the pictures out compared to other pages I've seen where the picture is sewn in completely. I did have to bend the photo a little to get it in and then lay it flat, but since there were no creases, it was unharmed!

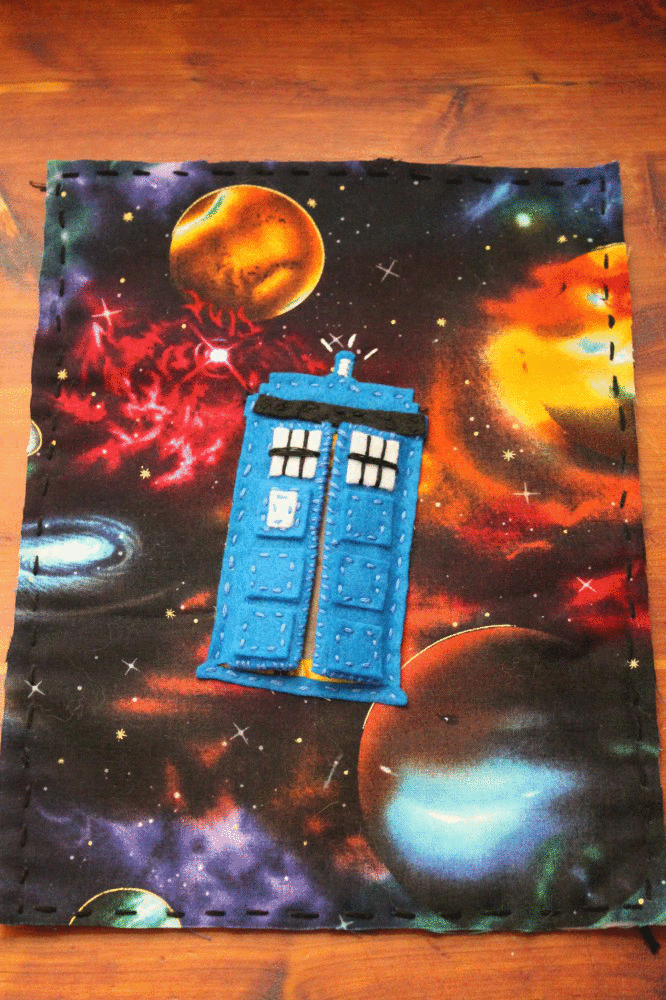
This page was the most fun to sew! We are BIG Doctor Who fans, so I decided I had to make a page with the Doctor. I purchased some awesome galaxy fabric that I found, stitched a TARDIS on it, and completed it with an iron-on-transfer of the 10th Doctor, David Tennant. Awww, love it!

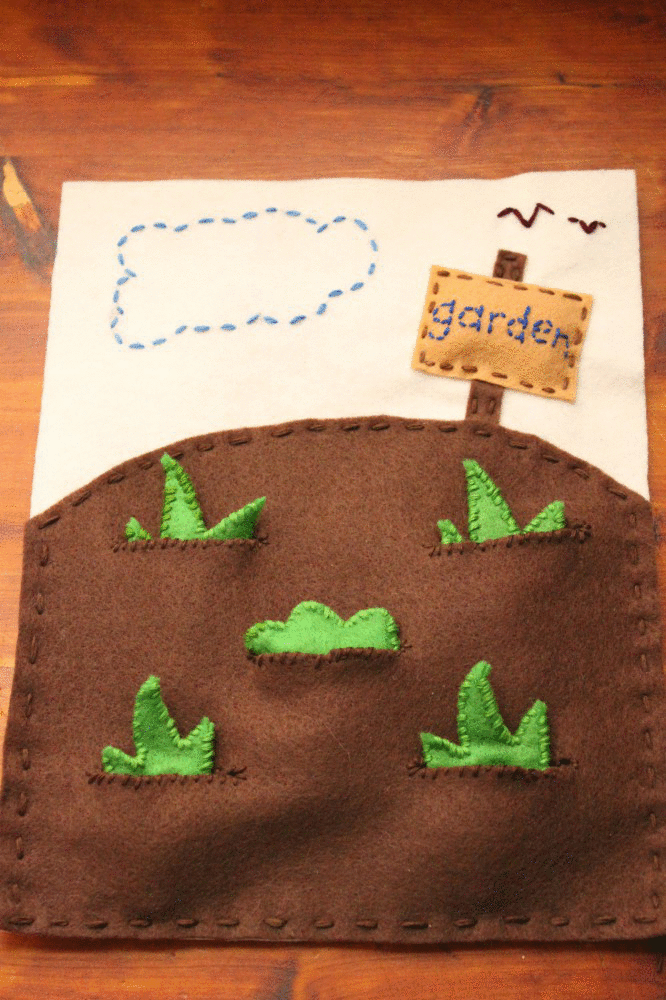
This garden page with pull out veggies was a lot of fun too, but it was also the most time consuming! The veggies are 3D and stuffed, making them extra fun to play with. :o) I didn't want to use my machine to make a button hole for the veggies to sit in, so I simply cut lines into the felt, and whip stitched around the openings so that the fabric would stay held together.

 That's all I have so far! I'm nervous and anxious to get some more pages finished! I want this to be more of a book rather than just a few pages. I'm really hoping it'll all come together in time! Only a little less than 2 weeks to go before it has to be completely finished!

The Dr. Who page is pretty ingenious! I ought to learn to sew. :)
ReplyDeleteBtw, love your blog! I am following you via Instagram and Flickr too. :D
Thanks for following!
ReplyDeleteVery professional and well-written content.
ReplyDelete