This is part three of my PicMonkey tutorial mini-series. This post may refer to steps that have already been introduced in part one and part two. You may need to refer back if you have not read these posts.
Inserting a Photo onto a Photo
1. Open 'edit photo' in Picmonkey. Choose your 4x6 blank canvas (we learned how to create this in part two).
2. Now that you have a blank canvas to work with, go to the 'overlays tab' and choose 'your own' at the top.
3. If you'd like a photo as your background, choose your photo, and drag the edges of the photo to enlarge it and fill the entire white canvas. If it doesn't fit your canvas exactly, you can always crop to cut off any white edging you might have. (If you don't want a picture as the background, then just adjust the size of the picture and lay it on the canvas where ever you'd like. Want to change your white background to color? Check out part two).
4. Now that you have your background set, go back to choosing 'your own' at the top of the overlays tab and open as many pictures as you'd like to drop on top of your background. You can also add text and effects as well as right clicking any image or text and choosing 'bring to the front' etc.
5. When you are finished, just click 'save' at the top!
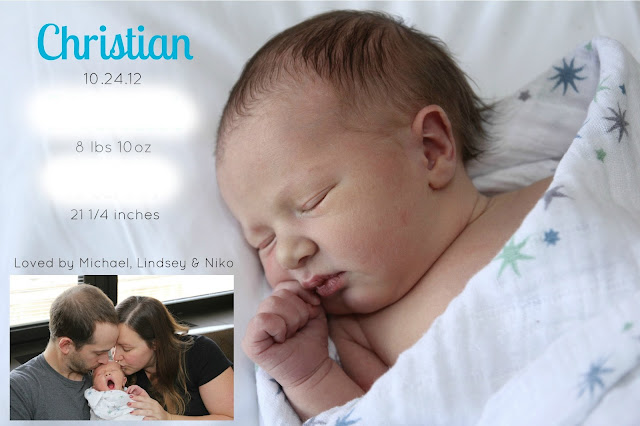
Using these steps, this is how I created my son's birth announcement!
(To print these pictures, I just uploaded my saved image to Walgreen's photo center under my account and printed out however many I needed. Since I used the 4x6 blank canvas, I just made sure my picture background was the same size of the blank canvas. It may have been overlapping a little, but not cutting anything off important. When I printed my pictures, they came out as nice 4x6's.)
I also created my son's birthday invitations and Christmas cards
using these steps too.
1. Open 'create a collage' in Picmonkey.
2. Next, click 'layouts,' then at the top click 'create your own.' This will make it one large box.
4. Click save at the top. Save this transparent background as '.png' so it remains transparent.
3. Go back to Picmonkey's home page and open this transparent background you just saved, under 'edit photo.' (Note: It may have looked like it saved as a black box in your folder but it will still show up transparent.) When you open it up, it will look like nothing is there.
4. Add whatever background you'd like. I chose this paper scrap under 'over lays', since I wanted to be able to see the paper edging. Drag the background to the desired size. You'll know you've got outside of the transparent image you've opened, when the sides start cutting off the image your sizing.5. Before adding text, right click your background (if it's a symbol or picture) and select 'send to back.'
6. When finished, chose the 'crop' option under the first tab on the left, 'basic edits.' You'll be able to see how your finished image will look like when it's highlighted for cropping.
What my image looks like after it's cropped. It automatically zooms in.
Another imaged used with a transparent background:
(only difference is there is no piece of paper as a background like the above steps):
Then I used this tag and added it to a photo using the 'photo on photo' steps listed above, then faded it a bit (how to fade- see part one, step #3). You can use this to add watermarks to your images.
Yea! You've made it through all three parts of my mini PicMonkey tutorial! :o)


No comments:
Post a Comment