

Creating a Collage and Word Art
This is part two of my PicMonkey tutorial mini-series. This post may refer to steps that have already been introduced in part one. You may need to refer back if you have not read this post.Create a Collage
1. Click 'create a collage' in PicMonkey.

2. Click 'open photos.' Once you have chosen and selected your photos to upload, they will appear on the left hand column as shown below. 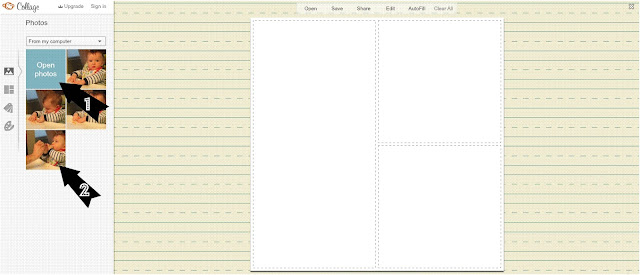
3.Once you have your pictures uploaded, click on the 'layout' symbol and then choose from the many layouts available. Click the layout you'd like. Below, I chose the Ducks in a Row layout for four photos.

4. Click back to 'photos,' then drag and drop your photos into the blank boxes. You'll see that each photo has been marked with a check mark once it has been used. If you end up not wanting to use all the boxes in the collage, hover over the empty box and an X will appear in the top right hand corner. Click it and the box will delete (you can see the difference between picture #4 and #5 below).

5. To change the border color around your photos, click the backgrounds icon on the very bottom, then change the color. You can also adjust the spacing of color between your photos from this edit box as well to make thick or thin color border. I kept mine thin.


Examples of collages, using different layouts:

There are many photos in this collage! Paired with text and symbols.

Just text.

Just text, border color and two tiny symbols.

A collage with a border color.
I then saved it, reopened it and edited it as a photo, and added text.
I then saved it, reopened it and edited it as a photo, and added text.

My sister's senior pictures, which I took. Do you like? Check out the photo session here :o)
I used the drag and drop method to create my own collage design.

1. First you'll need to make a blank canvas. Open PicMonkey collage. Delete all the collage cells so only one big blank box is left (how-to delete boxes is in 'create a collage' above).


2. Once you have your blank space you'll want to adjust the blank canvas dimensions. They are at the bottom of the screen. (See above) Choose which photo dimensions you'd like to have and enter the dimensions (ex. you want a 4x6 finished photo, enter in 1600x2400). Then lock the dimensions in by clicking the lock.

3. Save your blank canvas and reopen in PicMonkey under 'edit a photo.'

4. Your blank canvas will pop up and the possibilities are endless! Add different types and sizes of text.
 5. And a background color. Click on effects, scroll down to 'Draw,' choose your color, then draw it on.
(You can also change the background color while still in the collage editing platform, but I always like to save mine as a white blank photo so I can keep reusing them by just changing the color instead of making a blank canvas each time)
 You can also add symbols, labels, borders etc.
Examples of Word Art:
I created this word art for my son. It's just different colored text arranged on an 8x10 blank canvas. I left the background white so it looks like a poster when hung in a frame. (Middle and last name blurred our for privacy, you understand). The dots are just a row of periods, and to space out his weight shown, I just inserted spaces with the space bar.

(You can also change the background color while still in the collage editing platform, but I always like to save mine as a white blank photo so I can keep reusing them by just changing the color instead of making a blank canvas each time)

Examples of Word Art:
I created this word art for my son. It's just different colored text arranged on an 8x10 blank canvas. I left the background white so it looks like a poster when hung in a frame. (Middle and last name blurred our for privacy, you understand). The dots are just a row of periods, and to space out his weight shown, I just inserted spaces with the space bar.

I used this word art strategy for my son's birthday party invitation as well (below). I edited a blank 5x7 canvas, added text, drew on the background with blue and yellow with soft edges. You can control that in the edit box when you're on 'draw,' and I added a picture.
Wait...added a picture on top of another picture you say? How, you wonder? That will be in part three. :o)
Presto! An easy made invitation for free! Even better, I'm sending them via email from a free site = more free. Yea!!

(You can also block out
information, like I did above using PicMonkey. Simply add however many rectangular shapes you'll need to block your
information, change the length of your shape by clicking and dragging
the corner to your desired shape, and place on top of your information!
Save image under a different name so you don't overwrite your original
image. Done!)
This was a practice word art I made. I didn't end up using it, but I used the same steps that I mentioned previously. I used a blank canvas, added a label and symbol, and added text and a picture.

*All photos are my property and cannot be used without my permission.*
Last but not least, part three!

No comments:
Post a Comment