August 20, 2014

How to Replace Bumgenius 4.0 Leg Elastic

How to Replace Bumgenius 4.0 Leg Elastic
When I first started out cloth diapering, I tried to save money and purchase diapers used. The diapers were in pretty good condition but one thing I didn't really know to look at or think about was the elastic in the legs. A lot of the diapers I purchased came with worn or loose elastic causing the diaper to gap.

Onto needing to replace the leg elastic in a lot of these second hand diapers!
Supplies
scissors
needle
thread
thimble (optional)
small safety pin
1/4" elastic cut into 4 1/2" strips (or purchase the Bumgenius refresher kits which comes with elastic and aplix)   
and of course, the diaper 

1. Turn diaper inside out
2. Chose a side to start on and locate the elastic.
3. Pull a little on the elastic to expose it.
4. Cut as close as you can to where the end of the elastic was sewn down.
5. Put the old elastic on the safety pin so it doesn't retract back into the diaper.
6. Hand stitch the new elastic end to the diaper on the seam as not to puncture the outer shell, either in front of the old elastic piece or after. Tie off with a knot.
7. Give the new elastic a little pull to test out the stitch strength.
8. Pin the unsewn end of the new elastic onto the safety pin. you will now have new elastic and old elastic on the pin.
9. Slide the pin through the elastic hole and pull it out the other end. The opening for the elastic will look the same as the one you started with.
10. Cut off the old elastic near the stitches and throw away. Take the new elastic off the pin and sew down, again either before or after the old elastic piece that's already on the seam.

Repeat with the other leg.

Can you notice the side that has the elastic replaced? It's the side on the right! It looks much tighter and ready to go.
Look how much better it looks after I finished both legs!

Check out some of my other cloth diaper posts:
Cloth Diaper Favorites

*Cloth Diapering mini-series*
-The Beginning 
-Resources
-Stash & Supplies
-How to Start

Cotton Babies: Share the Love Program
15 minute DIY Coconut Oil Stick +Tea Tree Oil
What's in my cloth diaper bag?
10+ Combinations to Store your Soiled Cloth Dipaers +some tips!


August 15, 2014

A Few Favorites

These are a few things I've been diggin' recently, and boy are some realllly yummy.

1. Oatmeal Bread- This is my friend Christina's blog! I wanted to try out her totally awesome bread, and I'm so glad I did. It was really easy and tasted amazing. I'll definitely be making this as opposed to buying my own bread. This recipe makes 2 loafs.
I also really loved using the bread for a tomato sandwich, which, I had never had before! It was so delicious! All you need is bread, Mayo or Miracle Whip, tomato slices, and a sprinkle of salt. 
2. Another goody from Christina's site was the Korean Beef. It was easy, and now that I purchased a few ingredients that I don't normally have on hand (like sesame oil and soy sauce), I can make this more often! It was a family pleaser!

3. I Miss the Village- even though this article came out a few weeks ago, I still love it. It definitely speaks to us as a people needing a group gathering atmosphere, like when we used to live in close knit villages. There is something to be said about it "taking a village to raise a child." We all need each other, and we all need something from each other. I have met the author Bunmi Laditan in person and she is hilarious and refreshingly real! You can find her at The Honest Toddler.

4. Another article that peaked my interest was: Why Courtship is Fundamentally Flawed. I was raised in the sense that dating was fine, but the older I got, I thought courtship was more romantic and possibly better. After reading this article it definitely makes more sense that dating around (going on single dates) could be more beneficial!
 
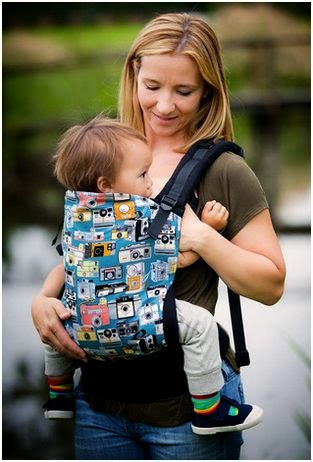
5. Look at this super cute Tula carrier, Click! I'd buy it in a heart beat if I didn't have my Boba G3. So adorable!

6. I thought this baby skunk video was super cute! Look how lovable he is...

7. I've been liking this blog: KZ and Me, because of all her posts on baby play! There are some great ideas like: textured runway, light exploration, and mini center play space.
8. How cute is this hanging wire basket?!

Wishlist Items that I'd love to try
-with Autumn around the corner, I'd love to try out a pie shield!
-stainless steal straws, especially since they are inexpensive ($6 for 4?!), harder to break than glass straws, and would help reduce trash! Just carry them with you.
-I'm all about saving money and reducing our footprint on Earth. The Nest Thermostat, although expensive, helps save energy by "learning" your schedule by keeping a record of your habits. For more details check out these awesome reviews by Young House Love: Cooling gets Cooler, and an update on how they like it, How you Like me Now?

*My current show obsession: True Blood!* I just got hooked on the show not too long ago and am all caught up on episodes! Plus, I love what Anna Paquin did for her new hair style!

August 6, 2014

Easy Compact DVD Storage Solution

Here is a great way to store your DVD in a nice compact-no-scratch way! 
Adapted from here.
Easy Compact DVD Storage SolutionYou can fit 120+ DVDs in one shoebox! 
 
This is what our bookcase that houses our DVDs looks like. I know it's not pretty, especially since we had our first child, we had to keep moving movies up up up, out of Christian's reach. It started to get dangerous since there was more weight towards the top of the case than the bottom. We didn't want it falling over on anyone and we couldn't see all the DVDs, so we needed a plan.

Supplies
-Tape
-DVDs
-DVD sleeves (only $5.50 for a box of 60 double sided sleeves, but buying 4 boxes for all your DVDs is like buying a single movie. It's only about $20 and they'll help keep your DVDs scratch free.)
-shoe box
-QR code reader (optional, there are many to choose from)
-QR code generator (optional, there are many, but this is the one I used) 
-scissors
-stock paper (heavy weight paper) or regular paper


1. Remove outer DVD description paper from plastic case.
2. Put DVD into DVD sleeve.
3. Tape the DVD descriptive paper on the bottom, and 3x on the long side to close openings except for the top. This will make a DVD sleeve.
4. Pinch the spine of the sleeve in half so it will lay flat.
5. Insert the DVD into the DVD descriptive sleeve along with any inserts from the case you'd like to keep.
6. File DVDs into a shoe box sideways. 
7. Cut a piece of paper into quarters and label them A, B, C etc. to alphabetize and sort your DVDs.

QR Code
You may also choose to create a QR code. This is to have a list of all the movies that you own, and to get to it quickly. 
1. Create a Google Drive Spreadsheet. 
2. As you change over your DVD cases for just sleeves, enter in the titles of the movies, making sure to leave out articles (a, the) that come first in the title. (ex. The Sound of Music>entered as>Sound of Music, The
3. Once you've entered all your movie titles, alphabetize your list by right clicking at the top of the column (or holding), and selecting Sort A>Z.
4. Get the link for your spreadsheet and enter it into the QR code generator. (Under the blue Share tab button, found at the top right of the page).
5. Print the QR code and tape it to your shoe box.

You can now have easy access to your movie list by scanning the code!

Recycle! Make sure to recycle your old DVD plastic cases! Ask your church, a teacher, art teacher, friends etc. They can be used for class videos, homemade video cds etc. You could maybe even try to sell them at an online Facebook group or yard sale. If nothing else, you can recycle them in your regular recycling bin.

Related Posts Plugin for WordPress, Blogger...